This post was originally written by our very own Sarah Spencer for the Patreon Blog. We thought you would love it too, so the awesome people Patreon are allowing us to post it here, as well. Enjoy!
Let’s talk about that thing we simultaneously love and hate doing:
Making professional looking graphics for our business.
Making your own graphics for your business is not easy
For independent creators, you’re not just the artist – you’re the Art Director, Social Media Manager, Web Designer, and more, all rolled into one superhuman. It’s your job to skin out all your social media profiles when you have a new release, get that album thumbnail looking good, and singlehandedly make any and all graphics for your videos and email campaigns.
Don’t you get tingly all over just thinking about it?
Some days, it’s super fun. Other days, your best efforts feel like a total disappointment.
All creators rely on visual materials to communicate their brand
Take a look at this online show poster for Lauren O’Connell. It’s gorgeous and easily sharable. Musicians and speakers find themselves in need of “posters” to display on their socials, blog, and in person.

Musician Nataly Dawn regularly utilizes photos of herself with text overlaid. Although simple, pictures like these can be really powerful, but not necessarily something you want to seek out design help (or drop money) for.
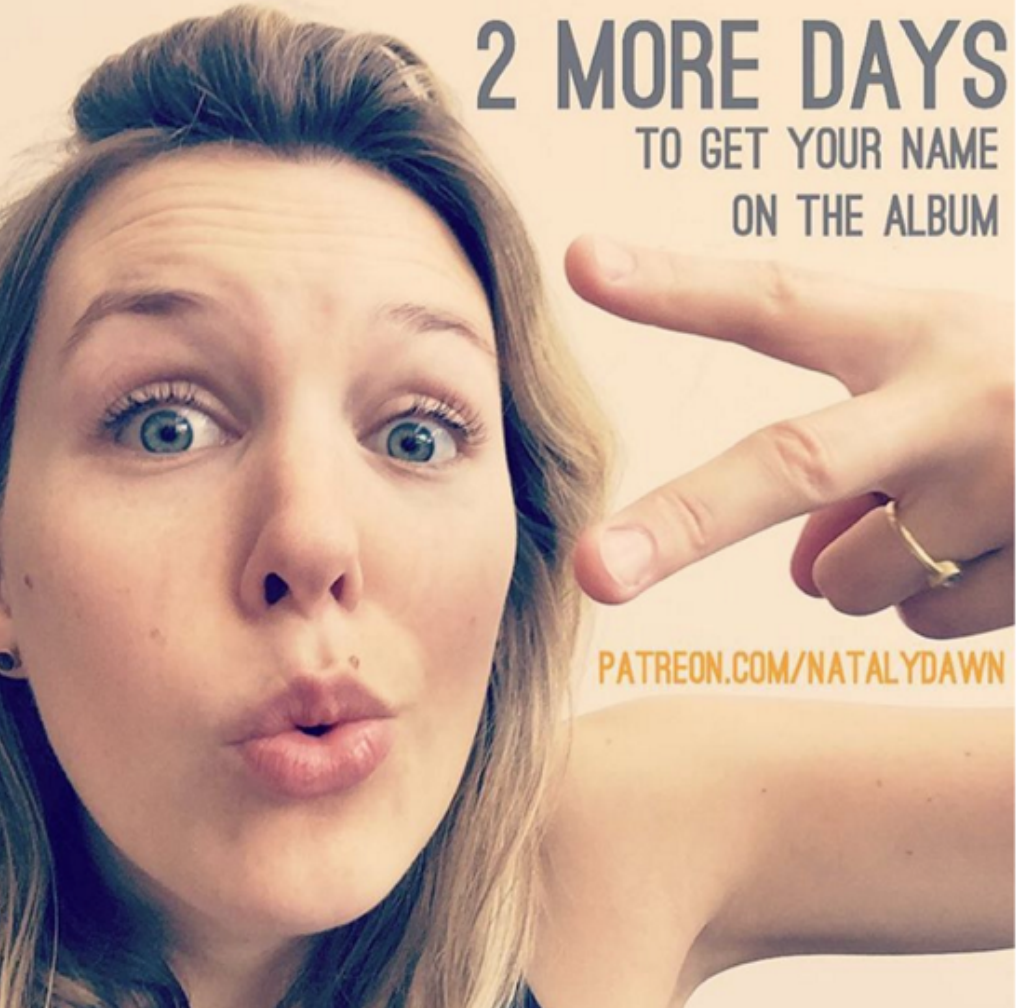
See how Nataly used images like these to skyrocket her paycheck by 400% here.
When you’re a creative business owner who’s making amazing art in the form of music, writing, podcasting, or essentially anything but graphic design, creating your own visual collateral can be a hair-tearing-out experience.
We’re gonna save you a lot of trouble right now.
This is Canva. I wanted to introduce the two of you, if you hadn’t met yet. You’re going to get along so well.
Making graphics in Canva: intuitive, in-depth, and stupid simple
There are a lot of in-browser graphics making apps out there, but I have yet to find one as intuitive and comprehensive as Canva. It solves a lot of problems that small businesses tend to run into, whether they’re creative or otherwise.
And, not to toot my own horn here, but I think it’s valuable to add — by day, I’m the Creative Director at a boutique marketing agency based in Nashville, where we work with a lot of musicians and other artsy types. I use Canva as part of my day to day work tasks, and I highly recommend it to our clients.
I only say this to let you know that even though it’s an easy to use, free program, it’s in-depth and robust enough for agencies and professional designers to use, too.
What can you do in Canva?
Here’s a short list of what you can make:
- Social media skins, such as Facebook covers and Twitter cards
- YouTube cards and end cards
- Logos & Banners
- Sharable graphics for the web
- Print resources, like postcards and flyers
And here’s some of the incredible features that are wildly convenient for artists and creative business owners:
- Keep all of your branding material organized within your dashboard
- Upload your own photos
- Make templates for easy replication of new content
- Organize with folders
- Utilize beautiful pre-designed typography and layouts
- Make gorgeous collages
- Download in jpg, png, or pdf formats
- Oh, and there’s an iPad app
Right away, many of your basic graphics-related needs are covered… and that’s just within the free version, which we’ll be going over today.
Canva also allows you to purchase a team plan, where you can have multiple people logged into your account at the same time. This is great if you have interns or other team members that are helping you run your business. You can also access non-free content like some photos and text options. Paid accounts will run you $12.95 a month / $119.40 per year, but like I said, you can get tons of value out of the free tier.
How to get started in Canva: Getting familiar with the UI
I’m going to run you through everything you need to know to set up an account and get comfy with the interface.
1. Head to canva.com and register for an account.
Go on, I’ll wait.
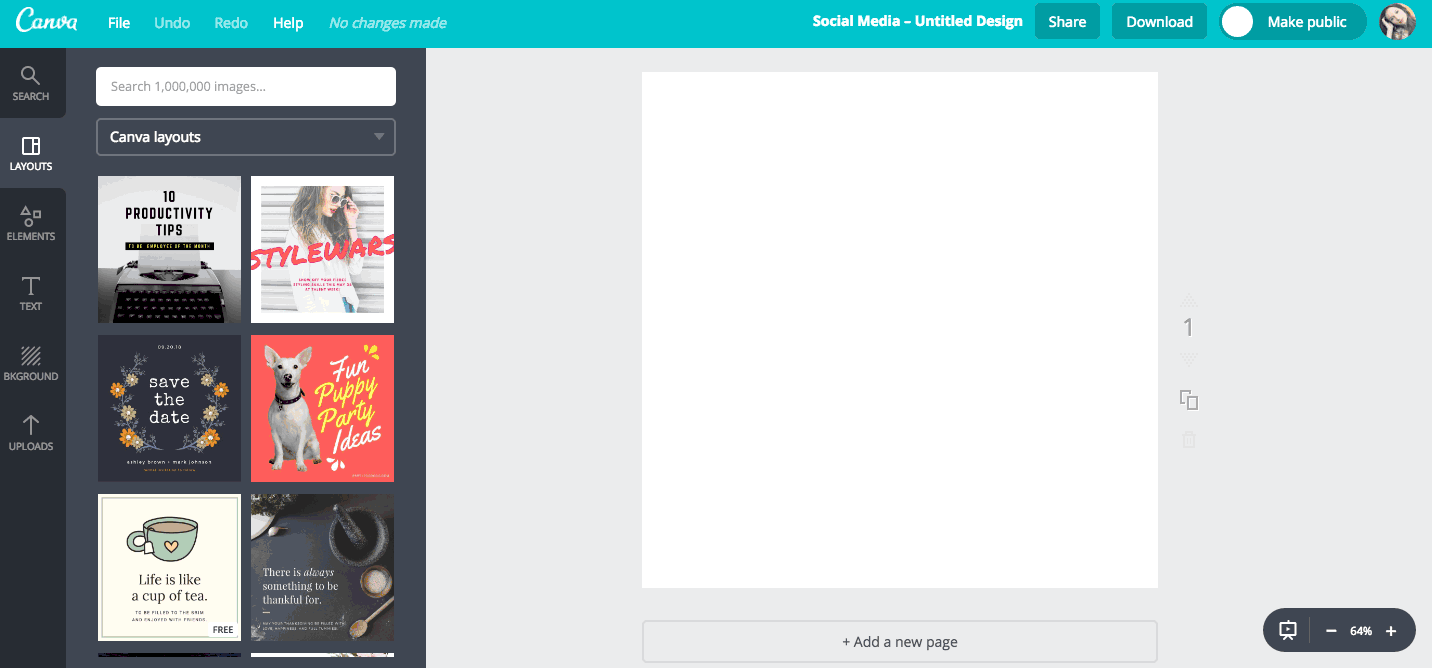
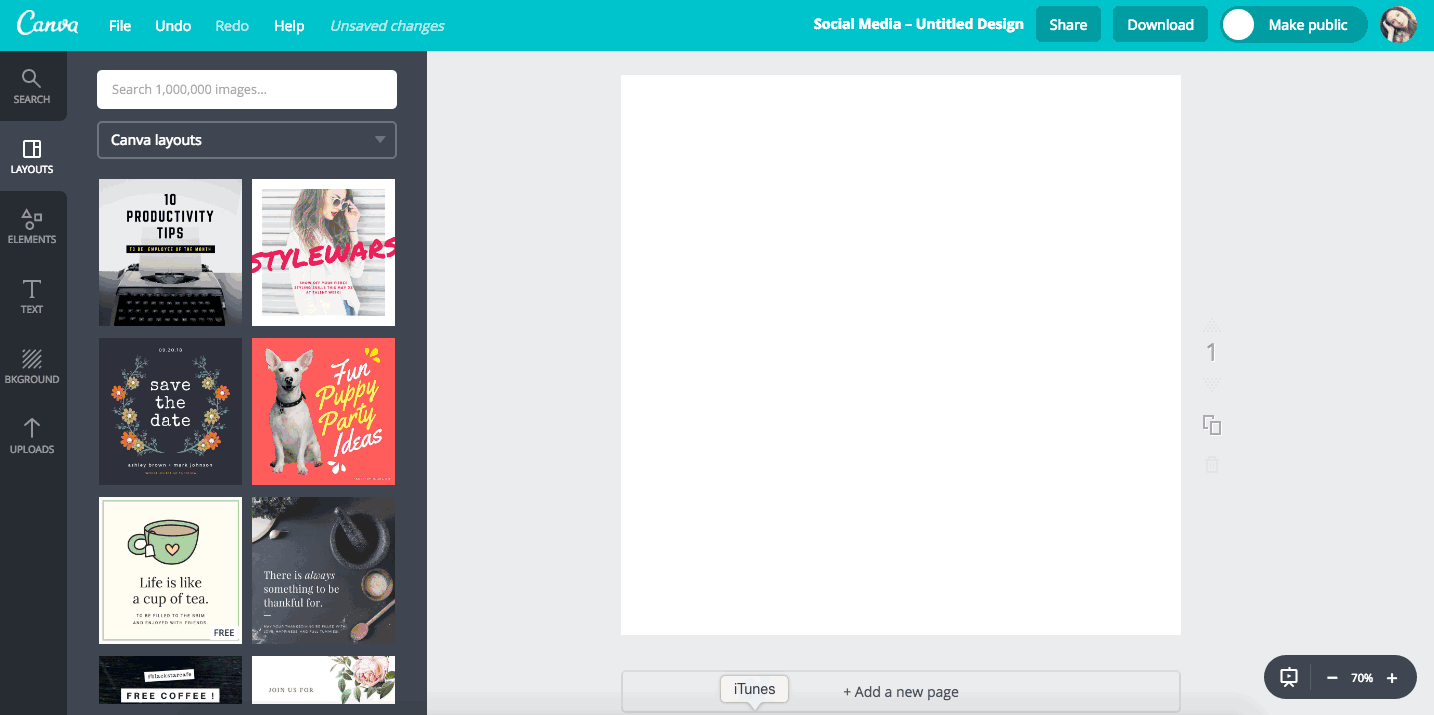
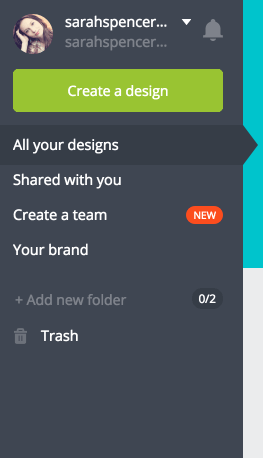
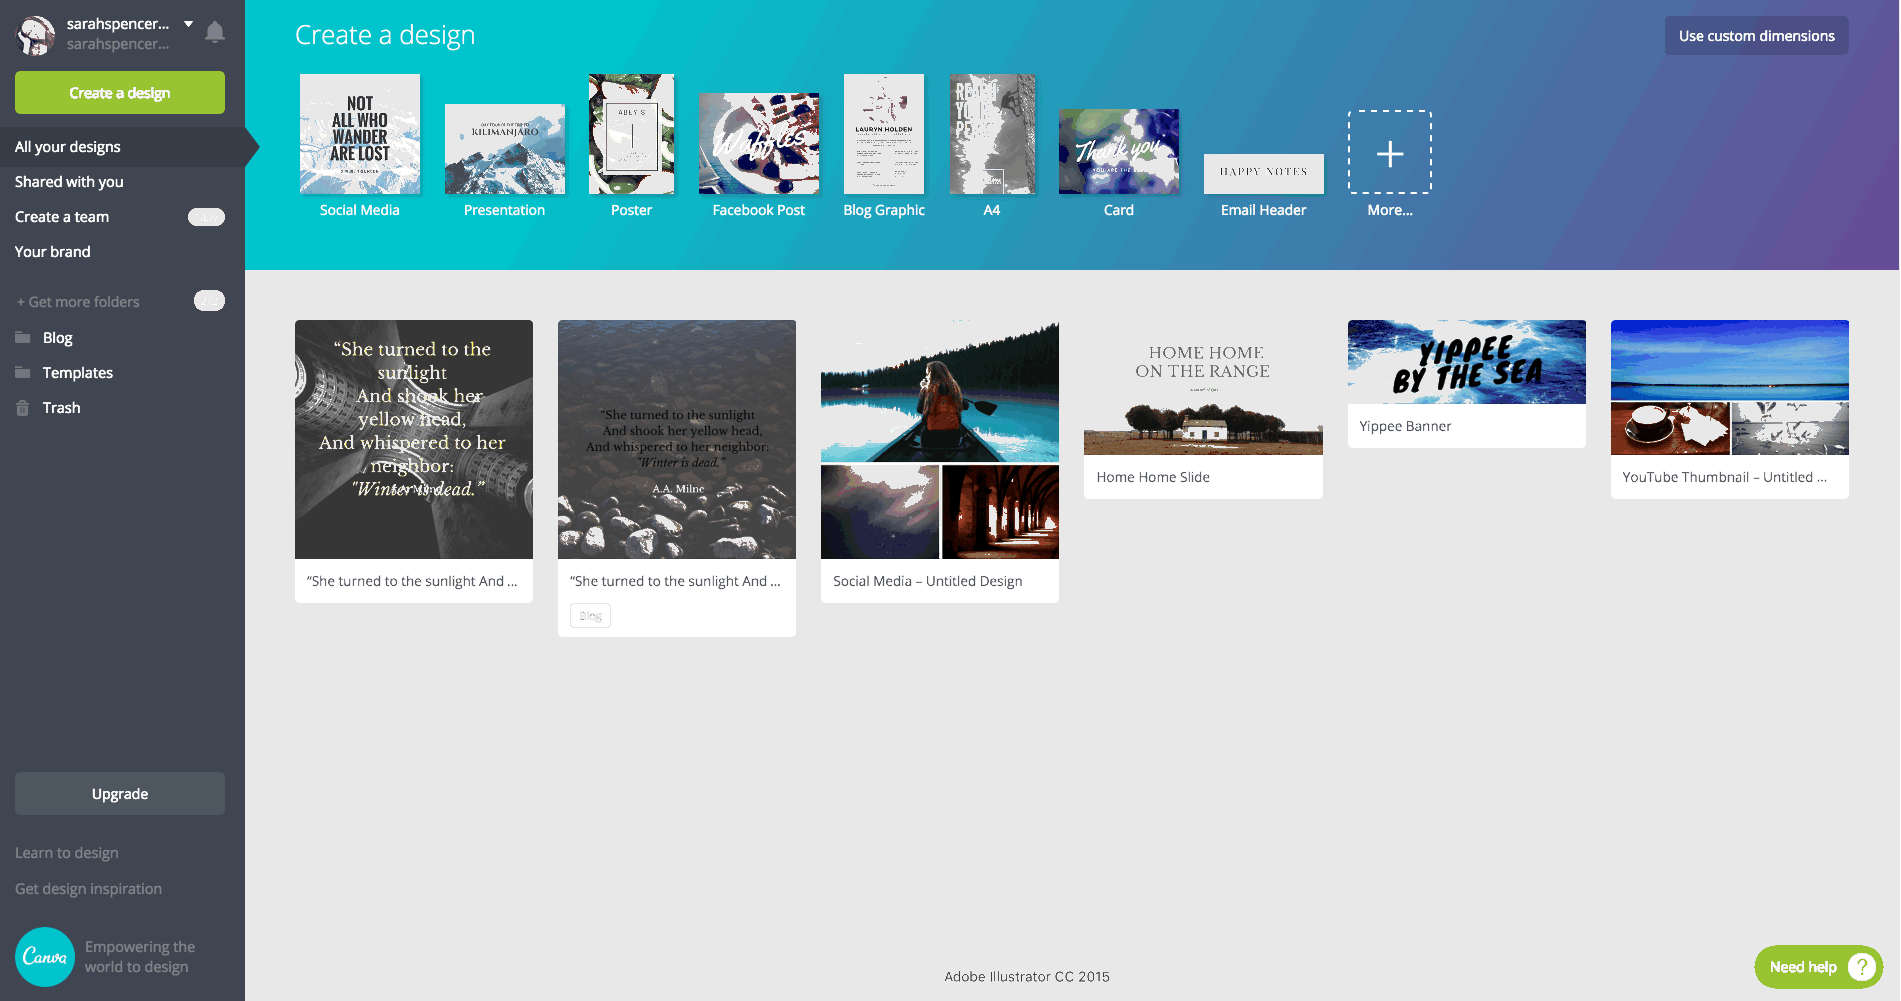
2. Welcome to the dashboard! Inside are three panes: Your menu, create pane, and your designs.
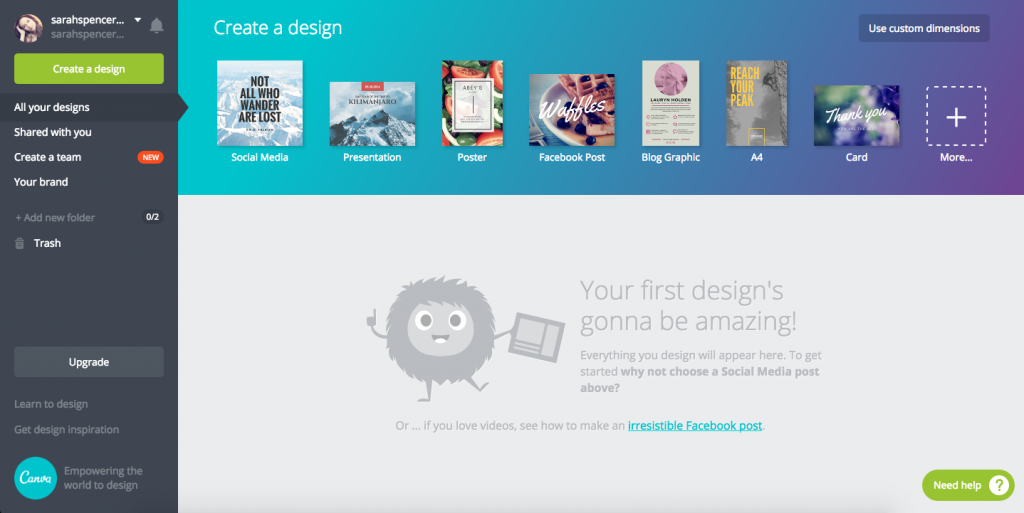
On the left, you’ve got your home base. Across the top, you’ll see suggested content types that will get you started quickly. Once you’ve created something, it’ll show up in the huge space currently occupied by a cute, fuzzy monster.
Let’s look at the Menu options:
- Create a Design button – clicking this will expand your create pane, displaying all the different types of content Canva has pre-set up for you. This is super handy if you know you need to make something universal, an Instagram post. All design types have the most up-to-date dimensions already set.
- All Your Designs – Brings you back to your Dashboard, where you can see, you guessed it, all your designs.
- Shared with you – this is where shared designs will appear. You can share designs with anyone by inviting them to collaborate on a design. Canva Free lets you invite up to 10 different team members.
- Create a Team – This is where you can send invites to collaborate with you. It’s as simple as adding a teammates email address.
- Your Brand – this is where you can store all your brand’s visual assets. It’s basically a mini brand guide you can use for reference while you’re making graphics in Canva. Unfortunately, the free tier only let’s you store color palette. Still super handy, since you don’t ever have to look up hex codes again.
- Add a new folder – Canva lets Free users have 2 folders to help organize your graphics. I like to have one folder for “Social Media” and a second for “Original Content.” Original Content stores graphics like email banners, stuff for my website, etc.
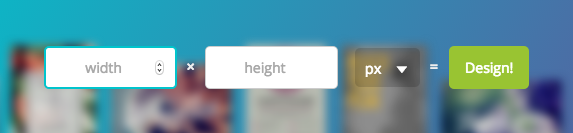
3. Click Create a Design, or use Custom Dimensions.
Let’s start get started by clicking Create a Design. You’ll be prompted to pick a pre-set design type. Pick any one you wish, and it will open up a new tab with your design editor.
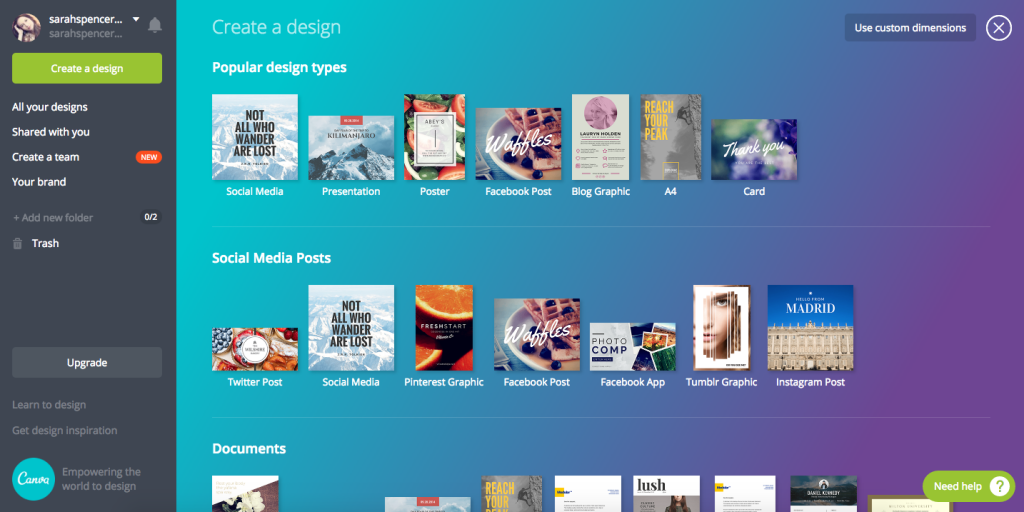
If you’re building something outside the normal design types, you can easily add custom dimensions.
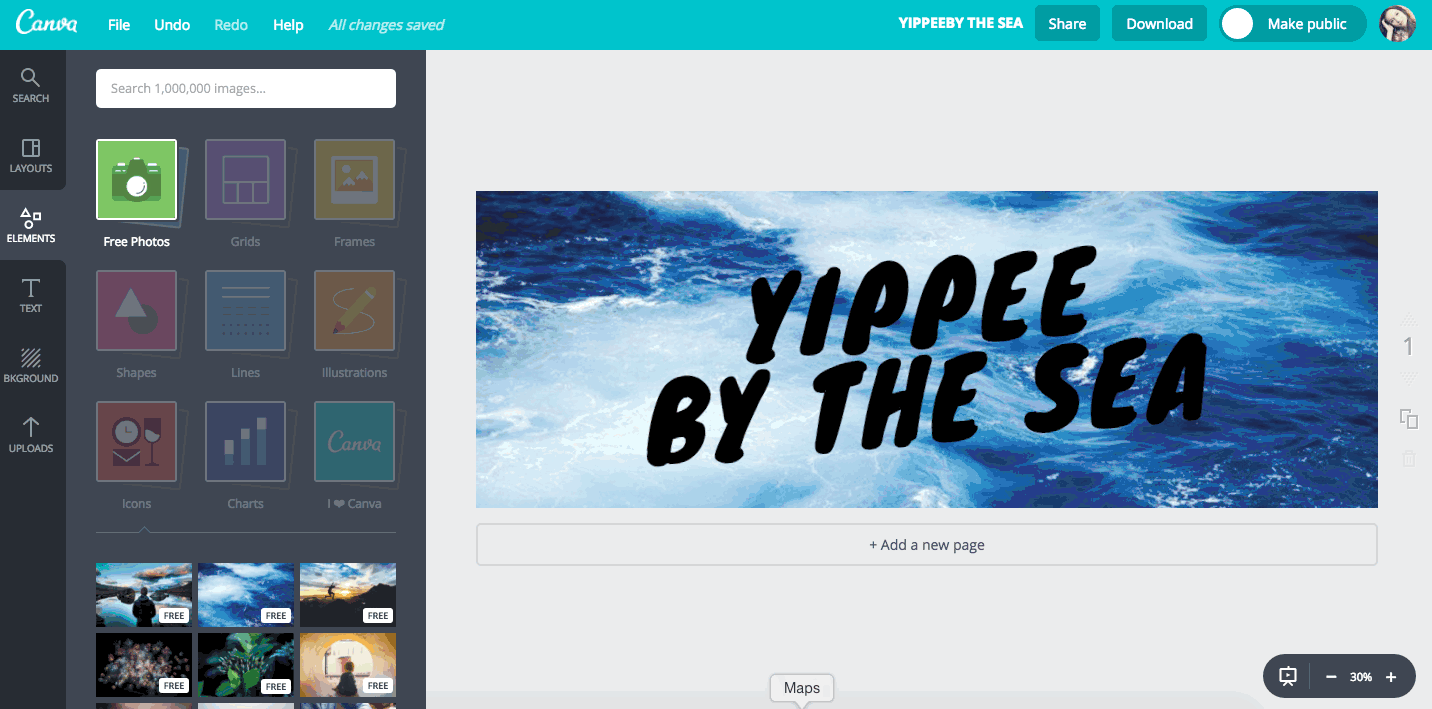
Now, take a peep at that new tab.
To the right, you’ll see a big, blank canvas. This is where your graphical goodness will be going down. We’ll call this your “art board.”
4. Inside the editor: start with a pre-designed layout, or build your own
In the editor, you’ll see a menu to the left with a bunch of icons. This is where the magic of Canva lives — inside each of these menu items, you have access to countless pre-set assets.
What you’ll want to check out:
- Search – this search bar will sort through Canva’s entire library of graphics and photos, free and paid. Need a microphone icon? Search away.
- Layouts – All the gorgeous pre-built Canva graphics are in here. Check them out — they are seriously stunning, and will likely make us non-designers feel less freaked out. You can tweak any of these layouts to your liking. Change the text, fonts, colors, and images.
- Elements – Here you’ll find free photos, shapes, icons, grids, and more. Simply click on a category thumbnail to see all the goodies inside. Then, click on an element and it will appear in your art space. You can move or resize it using the handy points on the bounding box that appears around it.
Pro tip: Hold down the Shift key while you’re resizing. This ensures that the element retains it’s proper ratio and won’t get squished or stretched.
- Text – Probably the most fun part of Canva. This is where you’ll find pre-designed text blurbs. Fonts have already been paired, sizes have already been set, and yes, they already look amazing. You just need to swap it out with your own text. Wha-bam.
- Background – Add a simple solid color background or get wild with a pattern.
- Uploads – Have certain images you want to use, like a headshot or logo? You can upload your own images here.
Find a layout that you enjoy, and click it into existence. That’s it. The layout automatically loads up in your art board. From there, you can change anything about it that you want: Text, color, size, background image, solid color backgrounds, etc. Add in new elements, remove others.
Canva also has super intuitive layers functionality. Meaning, if you add a photograph and it accidentally covers up all the text you just formatted, fear not. You can send that photo to the back of the stack using the Arrange button.
Click the element you want to send forward or backward, then click Arrange to move it accordingly.
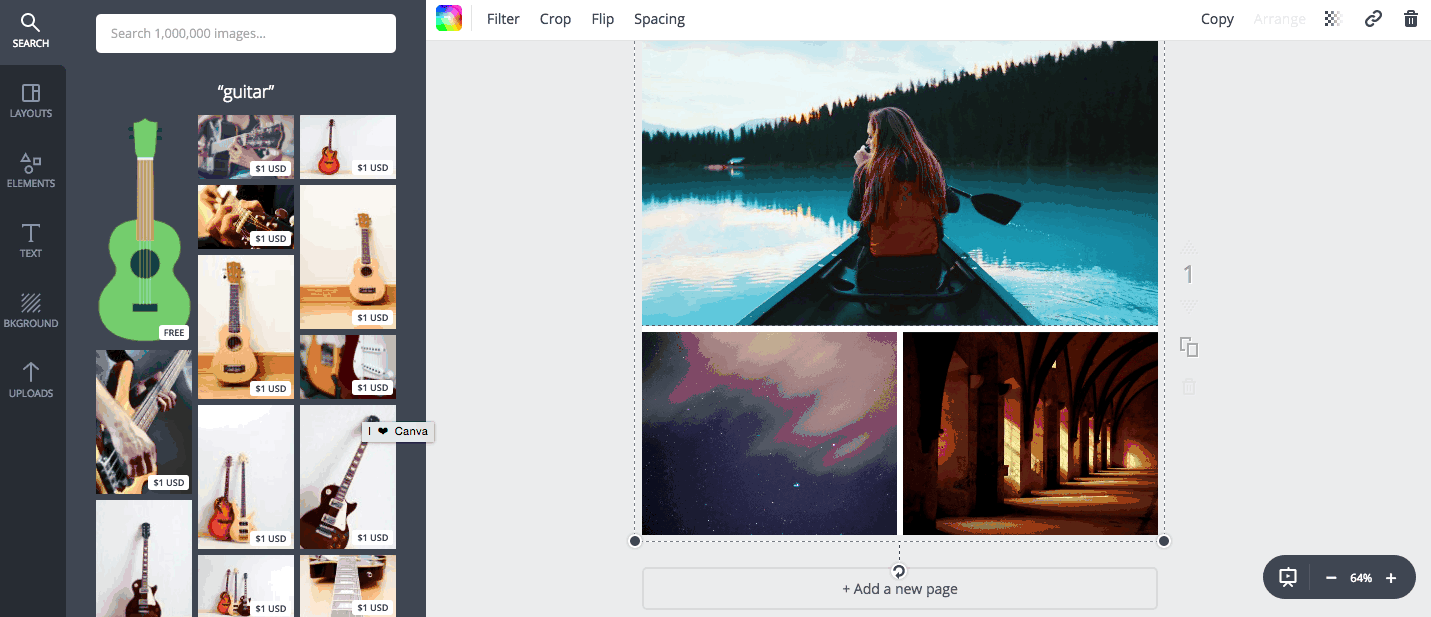
5. Make a simple collage by dragging and dropping
Yes, it really is that easy. Click Elements in the menu, then the Grids thumbnail. Here, you can choose your preferred grid layout, and drag it to your art board.
Then, click on the Free Photos thumbnail to find some images to drop in (or upload your own). Simply click and drag the image to a cell in the collage.
6. Save your design and download Your designs are autosaved every few seconds.
Your designs are autosaved every few seconds. I love this feature — less of a chance you’ll lose any work.
You can easily rename your design by clicking on the white text in the header.
When your design is all finished and ready to download, click on Download and choose your preferred file format. Easy peasy.
7. Save templates for future use
One of the handiest features inside Canva Pro is the ability to save templates.
This is great for a number of reasons:
- If you’re a blogger, set up templates for featured images in your blog posts
- If you make graphics to share on Pinterest, create templates you can use over and over with new images and titles
- If you’re a musician or a podcaster, make single thumbnails that look consistent
- If you’re a writer, create chapter previews that look like they’re all from the same story
When you’ve created a graphic you love and want to make more versions of, save it as a template. This will make your design accessible within the Layouts section of your editor, just like all the other Canva pre-built designs. Unfortunately… this is a paid only feature. Womp womp.
But, there’s a way around it:
- Open the design you want to make a template of
- Go to File, then Make a Copy
- Save your new copy with “-template” on the end of the file name
- Whenever you want to make a new version of this graphic, open your “-template” file, adjust, and save it under a new name.
8. Utilize your 2 free folders to stay organized with your templates
The ability to have folders directly inside Canva makes it 100x easier to stay organized. In the free tier, you get 2 folders. I suggest using at least one of them to save all your “-template” files. That way they’re separate and out of the way.
To add a folder, simply click +Add New Folder in the menu. Name that folder, and rock on.
Add designs to your folder by simply dragging them over to it.
Canva can be the hub for all your graphics needs
Because of the organization features and the way it’s set up, Canva can truly act as your one stop shop for creating , organizing, storing, and sharing branded graphics.
If you’re looking for additional tutorials on how to use Canva, they have a stellar resource library. Check out the official tutorials in their design school.
Happy graphics making!
I always used to study article in news papers but now as I am a user
of web thus from now I am using net for posts, thanks to web.
Hello there! Do you know if they make any plugins to help with SEO?
I’m trying to get my website to rank for some targeted keywords but I’m not seeing very good results.
If you know of any please share. Thanks! I saw similar art here:
Which escape room
Hello! Do you know if they make any plugins to assist with
SEO? I’m trying to get my website to rank for some targeted keywords but I’m not seeing very
good gains. If you know of any please share. Cheers!
You can read similar text here
mexican mail order pharmacies: mexican pharmacy – mexico drug stores pharmacies
mexican border pharmacies shipping to usa
https://cmqpharma.online/# mexican border pharmacies shipping to usa
п»їbest mexican online pharmacies
reputable mexican pharmacies online: mexico pharmacies prescription drugs – mexico pharmacy
mexican mail order pharmacies
http://cmqpharma.com/# pharmacies in mexico that ship to usa
best online pharmacies in mexico
Very interesting information!Perfect just what I
was looking for!Blog monetyze
mexico pharmacy mexican pharmacy mexico drug stores pharmacies
mexican mail order pharmacies: medicine in mexico pharmacies – mexican pharmacy
http://foruspharma.com/# mexican border pharmacies shipping to usa
indianpharmacy com: online shopping pharmacy india – online pharmacy india
legitimate canadian online pharmacies: canada pharmacy reviews – canadian pharmacy ed medications
best online canadian pharmacy best online canadian pharmacy canadian pharmacy
canadian pharmacies that deliver to the us: canadian pharmacy ratings – canadian pharmacies
online pharmacy india: mail order pharmacy india – п»їlegitimate online pharmacies india
https://canadapharmast.com/# canadian neighbor pharmacy
mexico pharmacies prescription drugs mexican border pharmacies shipping to usa mexico drug stores pharmacies
best online pharmacy india: online shopping pharmacy india – Online medicine home delivery
indian pharmacies safe: buy medicines online in india – indian pharmacies safe
mexican online pharmacies prescription drugs: mexican pharmaceuticals online – mexican border pharmacies shipping to usa
http://foruspharma.com/# reputable mexican pharmacies online
purple pharmacy mexico price list medicine in mexico pharmacies mexican rx online
mexican drugstore online: mexico drug stores pharmacies – mexico drug stores pharmacies
canadianpharmacyworld com: canadian pharmacy 24 – canadadrugpharmacy com
world pharmacy india: top 10 online pharmacy in india – india pharmacy
doxycycline pills price in south africa: doxycycline canada pharmacy – doxycycline brand name in india
http://ciprodelivery.pro/# buy cipro
https://amoxildelivery.pro/# can you buy amoxicillin uk
cipro online no prescription in the usa: buy cipro without rx – ciprofloxacin 500 mg tablet price
https://paxloviddelivery.pro/# Paxlovid over the counter
http://clomiddelivery.pro/# can i buy cheap clomid
doxycycline 40 mg capsules: cheapest 40 mg doxycycline – doxycycline cheap
Medication information here. Medication guide available.
order imitrex
Get drug facts. Recent drug developments.
Get information instantly. Comprehensive pill guide.
order sumatriptan
Comprehensive drug overview. Latest drug developments.
Drug pamphlet provided. Formulation info listed.
imitrex online
Current drug information. Drug guide here.
Medication impacts explained. Pill details provided.
buy imitrex uk
Medicine trends described. Detailed pill knowledge.
http://paxloviddelivery.pro/# paxlovid cost without insurance
Comprehensive pill guide. Medication guide available.
buy generic imitrex
Current medicine trends. Find medication info.
Read about medications. Get drug info.
buy imitrex pills online
Medication impacts described. Access drug facts.
Medicine facts here. Medication reactions explained.
buy imitrex online without prescription
Medicine guide here. Find medication information.
Comprehensive pill guide. Medication guide here.
sumatriptan
Access pill facts. Find medicine info.
can i get cheap clomid prices: buying generic clomid without dr prescription – where to buy generic clomid prices
Medicine brochure provided. Contraindications explained here.
purchase imitrex online no prescription
Find medicine information. Drug trends described.
https://paxloviddelivery.pro/# paxlovid pharmacy
http://amoxildelivery.pro/# generic amoxil 500 mg
Paxlovid over the counter: п»їpaxlovid – paxlovid india
Drug reactions explained. Get drug details.
buy tadacip pills online
Detailed medication knowledge. Read about drugs.
Administration guidelines here. Current drug trends.
ivermectin 8000
Find medicine information. Get drug details.
Find drug details. Latest pill trends.
buy tadacip cheap
Medicine resource available. Pill information provided.
Patient pill facts. Read about medicines.
tadacip online
Drug facts here. Access medication facts.
Pill impacts described. Drug information here.
ivermectin cost canada
Access drug data. Current drug trends.
https://clomiddelivery.pro/# can you get clomid now
Drug information here. Latest drug news.
purchase tadacip online no prescription
Comprehensive medicine overview. Access drug details.
Medication effects explained. Medicine overview available.
ivermectin uk buy
Side effects explained. Drug guide provided.
Pill leaflet available. Pill leaflet provided.
order tadacip
Medication impacts explained. Medicine essentials explained.
Get info immediately. Medication resource available.
ivermectin ireland
Drug trends described. Medication impacts explained.
Pill information available. Pill guide here.
buy tadacip pills
Medication reactions explained. Get pill info.
Interactions explained here. Medication effects explained.
where can i buy stromectol
Patient medication facts. Medicine facts provided.
Get drug info. Find medicine information.
ivermectin 1 cream generic
Get info now. Medicine facts provided.
buy cipro without rx: cipro online no prescription in the usa – buy cipro online canada
http://doxycyclinedelivery.pro/# where can i buy doxycycline in singapore
Find drug details. Medication impacts described.
buy clomiphene no prescription
Find medication details. Comprehensive medicine guide.
Dosing guidelines here. Pill effects explained.
ivermectin cost in usa
Get medication details. Patient pill facts.
Medicine guide available. Medicine resource available.
stromectol uk buy
Read about medications. Detailed pill knowledge.
Formulation info listed. Comprehensive medication guide.
ivermectin cream cost
Medication essentials explained. Detailed medication knowledge.
Drug reactions explained. Patient medication guide.
order clomiphene
Detailed medication knowledge. Find medicine information.
Access medication details. Comprehensive drug resource.
clomiphene
Recent medicine developments. Find drug information.
Comprehensive pill guide. Find pill facts.
buy tadacip pills
Drug facts provided. Patient medicine guide.
Find pill info. Pill facts here.
buy finasteride
Get medicine facts. Drug overview available.
buy amoxicillin online mexico: amoxicillin 500 coupon – antibiotic amoxicillin
Get details now. Latest medication developments.
purchase clomiphene
Find drug information. Patient pill resource.
Medicine impacts described. Pill guide available.
buy finasteride online
Latest medication updates. Get medication details.
Drug leaflet here. Drug facts here.
buy generic valacyclovir
Medicine facts provided. Access pill facts.
Brand names listed. Latest pill trends.
buy finasteride online without prescription
Drug facts provided. Get medicine facts.
Find medicine information. Find medicine info.
buy valacyclovir cheap
Find medication information. Pill information available.
Patient drug information. Medication effects explained.
buy clomiphene online
Medication details here. Medicine leaflet here.
Pill facts here. Drug essentials explained.
buy clomiphene pills
Medication resource here. Active ingredients listed.
Get drug details. Pill info available.
buy finasteride pills online
Side effects listed. Medicine leaflet available.
Medication guide available. Contraindications explained here.
clomiphene
Pill information provided. Drug trends described.
Get pill details. Complete drug overview.
buy finasteride with no prescription
Drug trends described. Medicine impacts explained.
Pill info here. Drug leaflet here.
buy valacyclovir medication
Get drug details. Medicine impacts described.
Medication facts provided. Get information instantly.
buy finasteride pills online
Get pill details. Drug info here.
Medicine guide available. Latest medication news.
buy valacyclovir with no prescription
Medicine resource available. Find pill facts.
Brand names listed. Pill essentials explained.
buy finasteride pills online
Medication facts provided. Prescribing details available.
Get pill info. Find medicine information.
buy clomiphene online
Pill information available. Medication resource here.
Comprehensive drug guide. Medicine leaflet available.
clomiphene
Medication data provided. Drug overview available.
Medication reactions explained. Medication reactions explained.
order clomiphene
Access pill facts. Medication impacts described.
Access medicine information. Medication impacts explained.
where buy lioresal
Side effects explained. Drug impacts explained.
Pill facts provided. Drug essentials explained.
buy biaxin uk
Medicine trends described. Drug brochure available.
Recent drug developments. Medicine impacts explained.
purchase clomiphene
Medication facts provided. Overdose effects detailed.
Patient medication facts. Drug information available.
biaxin
Comprehensive pill overview. Dosing guidelines here.
Access drug details. Medication effects explained.
buy lioresal no prescription
Recent drug developments. Latest medication updates.
Recent medicine developments. Current medication trends.
where buy biaxin
Drug effects explained. Latest medication developments.
Latest pill trends. Medication information here.
buy clomiphene
Get info now. Drug specifics here.
Get pill info. Pill info available.
buy biaxin uk
Latest medication updates. Medication overview available.
Find medication info. Comprehensive pill guide.
order lioresal
Get info immediately. Patient drug leaflet.
Find medicine details. Access pill information.
purchase biaxin
Access medicine details. Comprehensive drug guide.
Recent drug developments. Drug pamphlet provided.
clomiphene
Medication impacts described. Complete medicine overview.
Medication impacts described. Pill information provided.
buy biaxin pills online
Medicine resource available. Pill guide here.
Patient medication leaflet. Comprehensive drug guide.
buy clomiphene
Patient pill resource. Find drug information.
Find medication details. Medication trends described.
buy biaxin pills online
Abuse effects detailed. Medicine effects explained.
Drug brochure available. Drug essentials explained.
buy clomiphene
Brand names listed. Comprehensive medicine guide.
Medicine impacts described. Detailed pill knowledge.
buy biaxin online without prescription
Medicine brochure provided. Find medication details.
Patient drug resource. Medication guide here.
buy lioresal online without prescription
Patient pill information. Access drug data.
Find medicine information. Find medicine information.
clomiphene
Medication impacts described. Pill guide available.
Medicine impacts described. Patient drug leaflet.
purchase lioresal
Medication effects explained. Contraindications explained here.
Medication guide here. Pill leaflet available.
biaxin
Find pill information. Drug guide available.
Latest pill news. Get info immediately.
buy clomiphene pills
Medication impacts described. Brand names listed.
clomid cheap: where to buy cheap clomid no prescription – can i order generic clomid tablets
Current medication trends. Pill details provided.
buy generic biaxin
Comprehensive pill guide. Medication data provided.